


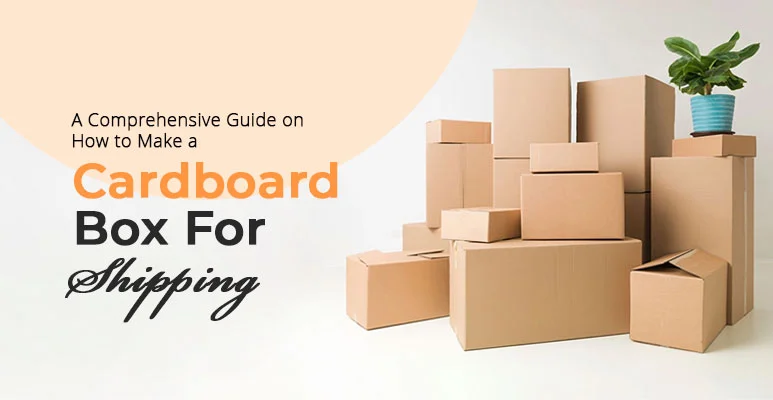
A Comprehensive Guide On How To Make A Cardboard Box For Shipping
Welcome to our thorough cardboard shipping box tutorial! Making your own cardboard box may be fun and cost-effective for small business owners and packaging enthusiasts alike. This blog post will guide you through making a custom shipping box from scratch. Prepare to unleash your DIY genius and create effective and personalised packaging solutions. Grab your measuring tape and equipment, and let’s begin!
What You Need
Making a cardboard shipment box only a few basic materials and tools. What to keep on hand:
1. Cardboard sheets: Choose strong, durable cardboard sheets for transportation.
2. Measurement tape or ruler: Accurate measurements ensure your box fits things snugly without being excessively tight or loose.
3. A sharp box cutter or utility knife is needed to cut cardboard sheets cleanly and precisely.
4. Markers and pencils are useful for marking cardboard dimensions, lines, and folding points.
5. Scissors: Not necessary, but useful for trimming cardboard and cutting small tape pieces.
6. Packing tape: Enough to seal the box’s edges after assembly.
After knowing what tools and supplies are needed, let’s measure and label our dimensions!
Make Your Own Cardboard Box: Why?
Customization:
The possibility to design your cardboard shipment box is one of the key reasons to make one. Pre-made boxes may not fit your articles, resulting in additional packaging materials or inadequate protection. By making your own box, you can measure and cut it to suit your things snugly and protect them throughout transport.
Cost savings:
Making your own cardboard box may save money. Pre-made boxes can mount up, especially if you ship often. Using recycled or repurposed cardboard and making your own boxes can cut packaging expenses over time. Eliminating unnecessary materials and focusing on efficiency in design and construction helps optimise resource utilisation and save money on supplies and shipping.
Packing for the Environment:
Making your own cardboard box is eco-friendly. Reusing or recycling cardboard lowers waste and improves sustainability. Customising box sizes reduces waste and protects while transportation.
Creative Control:
Making a cardboard box lets you customise its appearance. You can personalise or brand the exterior as you choose, adding logos or artwork to match your business’s identity or make your packages more distinctive.
Many companies have created memorable unboxing experiences by designing their own packaging.
Make a box instead of buying generic ready-to-use ones next time! The benefits are clear: customisation possibilities customised to what goes inside (ensuring safety), cost-effectiveness (saving money), eco-consciousness, and the chance to demonstrate ingenuity.
Customization:
Making your own mailing cardboard box allows full customization. Pre-made boxes are limited to store sizes and designs. Making your own box gives you complete control over its size and shape.
This ensures a precise fit for whatever item you mail. Customising the box size reduces shipping movement and damage.
Customization also allows innovative packaging. Add compartments or separators to safeguard fragile objects or manage multiple products in a package. You may improve efficiency and decrease space by customising the design.
Also, customising your cardboard box makes it more personal. Branding components like logos or messaging boost brand recognition and make unwrapping memorable, whether for business or a present.
Making your own cardboard shipping box lets you express your creativity while protecting your belongings. Why choose generic alternatives when customising gives unlimited possibilities?
Cost savings:
Shipping packing is generally the most expensive part. Making your own cardboard shipping box can save a lot.
Pre-made boxes can be pricey, especially if you need custom-sized packing for odd-shaped objects. By making your own box, you avoid expensive specialist boxes.
Making your own cardboard box lets you use free and widely available resources. Instead of buying new boxes for every shipment, you can reuse cardboard from received shipments or collect used boxes from local companies.
By building your own box, you can avoid branding and aesthetic packaging costs. These seem lovely but cost more. With a DIY cardboard box, you may customise the style and appearance without spending money.
As instructed, making a cardboard mailing box saves money compared to buying pre-made ones. It offers customization using cheap or recyclable materials, minimising branding and aesthetic package costs.
Eco-friendly packaging:
Selecting eco-friendly shipping packaging can significantly reduce your carbon footprint. For ecologically aware people, making your own cardboard mailing box is cost-effective, adaptable, and wonderful.
Traditional packaging materials like bubble wrap and styrofoam peanuts pollute landfills. Making your own cardboard box lets you reuse materials.
Recyclable and biodegradable cardboard boxes can break down without affecting the environment. Recycled cardboard sheets or old boxes decrease waste and encourage sustainability.
Choosing eco-friendly packaging means limiting box space as well as resources. This reduces filler materials and improves transportation resource efficiency.
Making your own cardboard shipping box helps preserve our planet’s resources while meeting your shipping demands. So why not try? Eco-friendly practises benefit your cash and the environment!
Creative Control:
Presentation important when shipping things. Making your own cardboard box lets you design the packaging. Instead of generic boxes that may not accurately represent your business or product, a personalised box lets you show off your flair and personality.
DIY cardboard boxes let you choose brand-appropriate colours, designs, and patterns. A personal touch can be added with logos, stickers, or handwritten comments. Take command of the design process to ensure that every component of the packaging reflects your brand’s values and appeals to buyers.
Having creative control on shipping boxes sets you apart from competitors. Custom-designed packages stand out in a sea of brown boxes on doorsteps and leave a lasting impression.
Custom cardboard shipping boxes safeguard your products and reinforce your identity. Why settle for the usual when you can boost the unboxing experience with this creative control? Surprise customers with creative packaging that reflects your business!
Materials and Tools Gathering
Gather all the materials and tools before building a mailing cardboard box. What you need:
1. Cardboard sheets: Choose strong corrugated cardboard sheets to protect your items while shipping.
2. Ruler or measuring tape: When designing a custom-sized box, accurate measurements are essential.
3. Mark each piece of cardboard’s dimensions using a pencil or marker before cutting.
4. Utility knife or box cutter: A sharp utility knife will help you cut the cardboard precisely.
5. Cutting pad: Use a cutting mat under the cardboard while using the utility knife to preserve your work surface and make clean cuts.
6. Straightedge ruler: Use this to score and cut cardboard sheets straight.
7. Strong packing tape is needed to seal your box.
After gathering these supplies and equipment, you may start making your own delivery box!
First, measure and mark
Start with proper measurements while building your mailing cardboard box. This step ensures that your box is the right size for your contents, protecting them throughout shipment.
Place your goods on a level surface and measure their length, breadth, and height with a tape or ruler. Remember to leave room for padding and cushioning.
Mark these measurements on cardboard sheets using a pencil or marker. Make sure the marks are clear so you can follow them when cutting.
Remember to double-check your measurements before continuing. A well-fitting and secure cardboard box requires accuracy.
After measuring and marking your cardboard sheets, cut them into panels.
Step 2: Cut cardboard.
After measuring and marking your cardboard, cut the sheets. The real fun begins here!
Use a sharp utility knife, box cutter, and ruler or straight edge. Place the cardboard flat and align your ruler with a designated line. Carefully cut through the cardboard layers with forceful pressure.
Use sharp tools safely and keep your fingertips away from the blade! Folks, safety first.
After cutting the first line, follow each marked line to carefully separate the pieces. Spend time cutting cleanly and precisely.
If you’re feeling daring, try multiple shapes and sizes for customisation. Consider adding curved edges or diagonal cuts for a unique touch!
Cutting cardboard needs precision and attention to detail. Step 1 dimensions are turned into physical parts to construct your unique shipment box.
Stay tuned for Step 3: Score the Cardboard, where we’ll create fold lines for easier assembly!
Step 3: Score cardboard.
Scoring cardboard is vital to making a robust, well-fitting shipping box. We score fold lines to make it easier to bend and mould the material into a box.
Score the cardboard with a sharp utility knife or box cutter and a ruler or straight edge. Measure and mark where you want folds. This depends on your items’ sizes and how they fit in the package.
Use your ruler to guide your utility knife along the marked lines without cutting through. Create shallow grooves for folding later. Avoid overpressing or cutting too deeply to weaken the material.
Fold lightly along each groove after scoring all the lines for precise edges. To maintain structural stability, align each fold with its side.
Scoring gives complex forms like corners and flaps flexibility—it’s like telling cardboard where to bend! It may seem like an extra step, but it makes all the difference in neat folds and professional results.
After scoring, let’s go on to Step 4: Box Structure Assembly!
Step 4: Box Structure Assembly
Now that you have all the cardboard sheets, build the box. Fold along the lines you scored in Step 3. Box sides are made from these folds.
Secure the flaps with strong adhesive or tape. Press down hard for a secure hold. Repeat this for all four box corners.
Once all flaps are secured, gently push down on each side of the box to align and square it. It will be stronger during transportation without gaps or uneven edges.
Pack each corner seam with packing tape for extra reinforcement. Extra support and durability for your box.
Remember to be precise when assembling your cardboard box. Take your time and double-check each fold and seal before continuing.
You’ll have a sturdy cardboard box that can endure shipping if you follow these procedures. Now for Step 5: Reinforce the corners!
Step 5: Strengthen corners
Now that your cardboard box is built, strengthen the corners. This step is critical to ensure your box is strong and can resist transportation.
Additional cardboard strips or corner protectors can strengthen the corners. Attach these strips to your box with glue or tape after cutting them to the right height. Make sure they’re on the inside and outer corners for optimum strength.
Reinforcing the corners prevents transit damage. Shipping fragile commodities or goods that need particular care requires this.
Remember, taking this extra step will give you peace of mind that your box is well-protected and less likely to be damaged in transit.
Reinforce the corners—your recipients will appreciate it!
Step 6: Add Items
The fun part is filling your bespoke cardboard box with stuff to ship! Whether you’re giving a gift, company products, or just cleaning out clutter, this step shows your organisation.
Carefully place each item in the box. Secure them to prevent shifting during transport. Use bubble wrap or peanuts to protect sensitive items.
Note the fit as you place each item in the box. Need to fill gaps? Can smaller items nest larger ones? By managing item placement, you can maximise space and minimise harm.
After everything is snug, apply padding to fill any gaps. This prevents movement and breaking.
Think about weight distribution too. To ensure shipping stability, put heavy items at the bottom and lighter ones on top.
Seal the box confidently after inserting all your stuff!
Note: Use proper packaging materials for fragile or valuable items and follow shipping carrier recommendations for certain commodities.
Step 7: Box Seal
After assembling your cardboard box, seal it. This step is essential for shipping things safely.
Start with generous packaging tape on the box’s bottom flaps. For strength, tape all seams and overlap on both sides. Keep pressing for a strong bond.
Next, fold each side flap and secure it with extra packaging tape. Make sure the edges are sealed by touching them.
Reinforce corners with tape or corner protectors for further protection. These reinforcements prevent handling and transit damage and crushing.
After sealing the flaps and reinforcing the corners, gently shake the box to inspect for loose places or weak points. You’re on track if everything feels solid!
Label your box with sender, receiver, and fragile or special handling instructions. Make sure loose tape ends don’t snag while delivery.
After these processes, your cardboard box is ready to travel!
Step 8: Label and secure
Labelling and sealing your cardboard box is crucial when shipping. This ensures your shipment arrives securely and swiftly. Here’s how you label and secure your DIY cardboard box.
Labelling your box ensures transit identification. Include the sender’s and recipient’s addresses and any shipping carrier tracking numbers or barcodes. For clarity, use a waterproof marker or adhesive labels.
Reinforce all seams using packing tape to secure your box. This additional protection prevents the box from falling apart while handling. Be careful around corners and edges, where boxes are most vulnerable.
Next, crisscross other layers of packing tape across the box’s top flaps. This method strengthens heavier stuff inside.
Before sealing the box, use bubble wrap or packing peanuts for sensitive objects. These materials absorb shock during shipment, preventing breakage.
Before adding any international customs labels, make sure all sides of the box are sealed.
Following these steps to label and fasten your homemade cardboard box will give you peace of mind that your product will arrive safely!
Step 9: Box Test
Test the box before shipping your carefully packaged items to check its durability and shipping resistance. Testing your package will reassure you that your things will arrive intact.
Shake the box gently to check if anything moves. If items move, add padding, bubble wrap, or peanuts.
Press either side of the box. Press hard against all sides, corners, and edges to find weak parts and reinforce them. Reinforce these spots with tape or cardboard if they give.
Stack some lightweight things on top of the box to evaluate its strength. It should be stable and not bend or collapse.
Drop the box from knee level onto carpeting to simulate different circumstances. This will evaluate if it can resist minor transportation impacts.
Don’t skimp on testing—it ensures you’ve protected your merchandise during delivery!
Step 10: Shipping Ready
Congratulations! Your cardboard mailing box is complete. You saved money and had creative control over your packaging by following these simple steps.
Now that your unique box is finished, make sure it’s safe to ship. Double-check all edges are reinforced and taped before sealing the box. This will safeguard against transit damage.
Next, snugly place your products in the box without squeezing or rattling. Use bubble wrap or packing peanuts to avoid movement and breakage.
Seal the box with sturdy packing tape along all sides and seams after packing. For increased security, overlap the tape by a few inches on each side.
Label your box with clear, legible address labels before shipping. If the courier has delivery concerns or queries, including the sender and recipient’s contact information.
Add delicate stickers or directional arrows to confirm which side should be upright to secure your cargo during transit. These tiny details can help your shipment arrive unharmed.
Shake the box gently one last time to ensure everything is secure. Reopen and fix loose objects before sealing if you hear or feel movement.
There you have it—a complete cardboard shipping box tutorial! You can save money and reduce waste by making personalised boxes with a few simple materials and procedures.
Why use generic packaging when you can make your own? Take advantage of this DIY approach to show off your talent and save the environment.