


Crafting Convenience – How To Make A Cardboard Box With Lid
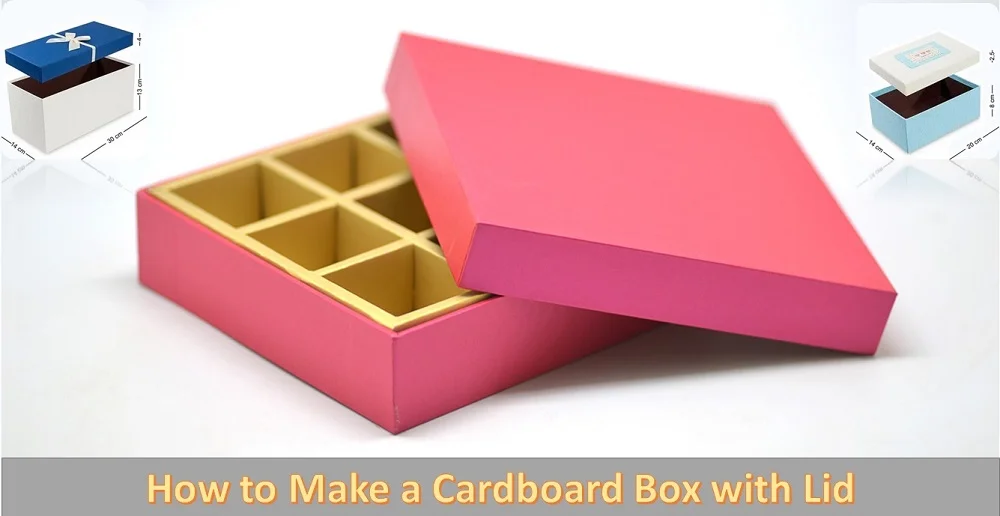
Among the many DIY skills, knowing how to create a cardboard box with a fitted lid stands as a versatile and practical art form.
Whether you’re an online seller striving to provide unique packaging for your products or an individual seeking a personalized touch for gifts and storage solutions, this guide will be your compass. By the end of this guide, you’ll not only be proficient in box making but also inspired to infuse your unique style into every creation.
Why make a cardboard box with a lid?
Fit Your Needs:
One size doesn’t fit all when it comes to storage. Crafting a cardboard box with a lid lets you tailor every detail. Need a specific size or shape? No problem! Need containers or dividers? You got it! Whether you’re storing fragile objects or managing art supplies, making your own box meets your specific needs.
Cost-Efficient:
Let’s face it: prefabricated storage boxes can be expensive. Fear not! Making your own cardboard box saves money without sacrificing quality. All you need are some basic items you can find around the house or at an affordable local store. With some time and work, you can make a solid, usable box without breaking the bank.
Eco-Friendly:
Making your own cardboard box is eco-friendly in today’s society. Instead of using mass-produced plastic containers, reuse old cardboard boxes to reduce waste. This reuses materials and reduces environmental effects.
Creative Expression:
Crafting is a way to express yourself and be creative. Custom box design and decoration—let your imagination go wild! With brilliant colours and patterns and unique touches like stickers and ribbons, each handmade product reflects who you are.
Why use conventional, off-the-shelf storage when you can be creative and save money? The process may seem difficult at first, but once you’ve tasted convenience, you’ll never go back! The next sections will walk you through making your box.
Materials needed:
Cardboard: The star of your box and lid is cardboard. Find thick, robust cardboard that holds its shape.
Rules or measuring Tape: A correctly sized box with a fitted lid requires accurate measurements. Use a ruler or tape measure for accuracy.
Mark your cardboard measures with a pencil or marker. These guides cut and fold.
Craft knife or scissors: Cardboard requires sharp instruments. Cut the pieces with scissors or a craft knife, whatever you choose.
Bone Folder (Optional): An excellent tool for scoring and folding cardboard cleanly. It makes box assembly easier and has sharp edges.
Strong glue or double-sided tape work nicely with cardboard. Make sure it bonds well without hurting the material.
If you wish to decorate your box, gather coloured paper, fabric scraps, ribbons, stickers, or paint. Show your creativity!
After learning what supplies are needed, let’s make our unique cardboard box with a lid! The next part has step-by-step instructions!
Steps to Make a Cardboard Box with Lid:
Step 1: Cut and measure cardboard.
To make a cardboard box with a lid, measure and cut the cardboard. This crucial step determines your box’s size and shape.
Start with thick cardboard, a ruler or measuring tape, and a sharp utility knife. Work on a clean, flat surface.
Next, carefully measure your box using a ruler or tape. Consider what you’ll store in the box and determine measurements.
Mark the desired dimensions on the cardboard with a pencil or marker. Recheck your measurements before continuing to ensure accuracy.
Time to chop! Carefully cut each box side along the prescribed lines with a sharp utility knife. Handle sharp things slowly and carefully.
Smooth edges will make box assembly easier, so precision is crucial. After cutting, polish the rough edges using sandpaper or an emery board.
Accurate measurements and clean cuts will help you make a lovely cardboard box with a lid. Roll your sleeves, and let’s go to Step 2!
Step 2: Fold and Score
Step 2: Score and fold creased cardboard for clean, precise folds. This step is essential for a smooth box.
Start by placing a ruler or straight edge along the fold lines. Press a scoring tool or butter knife gently on the cardboard to make indents without cutting through. This weakens the cardboard’s fibres at specific locations, making folding easier.
After scoring all the lines, fold each score line using your fingers or a bone folder for sharp edges. To obtain smooth, equal folds, take your time.
Accurate scoring and folding will make a box stronger and more professional. Don’t rush through this crucial step—double-check your dimensions!
After scoring and folding our cardboard, we may make the lid in Step 3. Our next portion will continue crafting convenience with our DIY cardboard box!
Step 3: Make the Lid
After making the cardboard box base, make the lid. Cardboard boxes need lids to preserve and secure their contents. It also makes your DIY project elegant!
Measure and cut another cardboard piece to fit your box base’s measurements to make the lid. Leave area for overlap when fitting the lid on the box.
Next, score each cardboard side using a ruler and scoring tool. This simplifies folding afterwards. Fold along these scored lines like the box base.
Trim excess material from each corner at an angle for a secure fit. This allows for smooth closure and opening without bulges or gaps.
After carefully folding both corners, test the lid’s fit on your box base. Adjust by trimming or folding until it fits perfectly.
Your DIY cardboard box will look and operate better with a lid. Create something special by taking your time with this phase!
Step 4 will show you how to assemble your DIY cardboard box with its new lid!
Step 4: Box Assembly
After measuring, cutting, scoring, and folding the cardboard, build your box! Take your glue or tape and start constructing.
Start by generously applying adhesive to a flap. Press it hard on the neighbouring side panel to secure it. Repeat with all four corners to connect all sides.
Fold the remaining flaps on each side and glue or tape them in place. Align them nicely for a smooth finish.
Admire your rectangular structure—it’s starting to look like a box!
If needed, apply tape strips to the edges to strengthen them. This will prevent things from sagging and collapsing when filled with them.
To ensure everything holds together, gently shake your box after you’re pleased with its strength.
Voila! Your cardboard box with a lid is complete. Though easy, this step is essential to keeping your stuff safe inside.
After completing our basic foundation, let’s decorate in Step 5. Watch for more interesting ideas!
Step 5: Decorate
After assembling your cardboard box with a lid, be creative and personalise it. Decorating your box makes it stick out and look good. Here are some inspirations:
1. Choosing a gorgeous patterned wrapping paper that suits your box’s theme or function Measure and cut the paper to fit each side, then glue or tape it in place.
2. Paint and stencils: Get creative with paintbrushes! Create creative box designs using vivid acrylic paints or pastels. More complicated patterns can be made with stencils.
3. Washi tape: This colourful and patterned decorative tape is great for accenting or bordering your cardboard box with a lid.
4. Fabric embellishments: Use fabric scraps, ribbons, lace, or buttons to give your box texture.
Decorating is unrestricted; use your imagination! Try different materials and methods until you get the desired effect.
By decorating your cardboard box, you show off your uniqueness and taste. Personalising a present or organising it at home makes it more unique.
Step 6: Personalise
After making a cardboard box with a lid, personalise it to make it distinctive. This step is about expressing your creativity and making the box reflect your personality or purpose.
Colour your cardboard box to personalise it. Create patterns or designs on the box by painting or stencilling. Cover the box with ornamental paper or fabric using glue or double-sided tape.
If painting or covering isn’t your thing, try ribbons, buttons, beads, or stickers. These tiny tweaks might improve your box’s appearance.
Other crafting techniques include decoupage, where you cut out magazine or printer images and apply them to the box with Mod Podge.
Remember that personalising can be utilitarian as well as aesthetic. If you’re storing the box, add partitions for greater management.
Let your creativity go wild and experiment with different materials and approaches until you get a result that makes you happy every time you see it.
Step 7: Finishing
After making a cardboard box with a lid, add the finishing touches to make it special. Let your imagination flourish and make your box stand out here.
Painting or decorating the box’s exterior adds style. You might decoupage with patterned paper, acrylic paints, or markers. Use your imagination to design a box that matches your style or function.
If painting isn’t your thing, decorate the lid with stickers, ribbons, or washi tape. These little ornaments may quickly brighten and personalise your cardboard masterpiece.
Line your box with beautiful paper or fabric for an elegant look. This looks good and protects your belongings.
Never forget labelling! Labelling the box’s exterior helps you identify its contents, whether for organisation or enjoyment.
After these final tweaks, behold your handmade cardboard box with a lid that meets your needs and exhibits your ingenuity!
Crafting should be fun! You can try numerous methods and materials to create your own masterpiece. Happy creating!
Conclusion
The cardboard box with a lid project is over, but the options are unlimited. Create a bespoke container that meets your needs with a few basic materials and steps. No more taking generic cartons that don’t fit or buying pricey ones. You controlled and customised the process by building your own box.
You can be creative and save money by making your own cardboard box. Choose from several beautiful alternatives or tailor the box with unique designs or texts. This practical DIY project lets you express yourself.
Remember the environmental benefits! Reusing cardboard and making boxes instead of buying them reduces waste and promotes sustainability. A little step towards eco-friendliness in daily life
Go ahead—measure, cut, fold, assemble, and decorate—and unleash your creativity while enjoying the convenience of customised cardboard boxes with lids. Be creative and build storage solutions that reflect you!
The possibilities for convenience with homemade cardboard boxes are boundless!
Optional tips and tricks:
Making a cardboard box with a lid is fun and gratifying. As you start your creative path, here are some ways to improve your craft:
1. Reinforce the corners: Add cardboard or tape to the corners to strengthen your box.
2. Cover your box with ornamental paper or fabric before constructing it to make it look more professional.
3. Dividers: Dividers may be handy, depending on what you plan to store in your box. Cut cardboard strips and glue or tape them vertically inside the box.
4. Try other sizes and shapes: After mastering a rectangular box with a lid, try squares, triangles, and hexagons! Let your creativity soar.
5. Handles might make box transit easier if you plan to carry them often. This can be done with rope, ribbon, or old drawer pulls.
6. Make personalised labels: label each box with its contents or an artistic touch.
Practice makes perfect when making cardboard-lidded boxes. If your first attempts don’t go as planned, appreciate the learning process!
Whether you need storage or distinctive gift boxes,
You can customise cardboard boxes by making them yourself.
You need them cheaply and sustainably.
Additionally,
It unleashes creativity with unlimited possibilities.
So get those materials.
Just follow the procedures above.
and start an interesting creative adventure today!
Happy Crafting!